

A Beginner’s Introduction to Beach Fishing
If you’ve recently retired from work and found yourself with more free time on your hands than you know what to do with, then you might be open to ideas about how to fill some of it. If you’re lucky enough to still have good health when you reach the end of your working life, retirement can present various opportunities.
If you’re looking for an activity that combines a little relaxation with physical activity and the great outdoors, then beach fishing might just be the perfect fit. Beach fishing offers an ideal blend of tranquillity and excitement, making it a highly rewarding pursuit for individuals of all backgrounds.
One of the primary benefits of beach fishing is its calming effect. The rhythmic sounds of the waves and the serene coastal environment can significantly reduce stress and promote mental well-being. As a retiree, you may find that this hobby offers a wonderful way to unwind and reconnect with nature. Moreover, the physical activity involved in casting, reeling, and walking along the shore can help keep you active and maintain your overall fitness.
Another advantage of beach fishing is the challenge and thrill that trying to catch fish can bring. Each catch, whether big or small, offers a sense of achievement and joy. Additionally, the knowledge and skills you will acquire, such as understanding tidal patterns, identifying fish species, and mastering different knots or fishing techniques, can keep your mind engaged and growing.
An excellent resource when fishing tidal waters is the Tide Times website which has information on tide tables on over 700 UK locations.
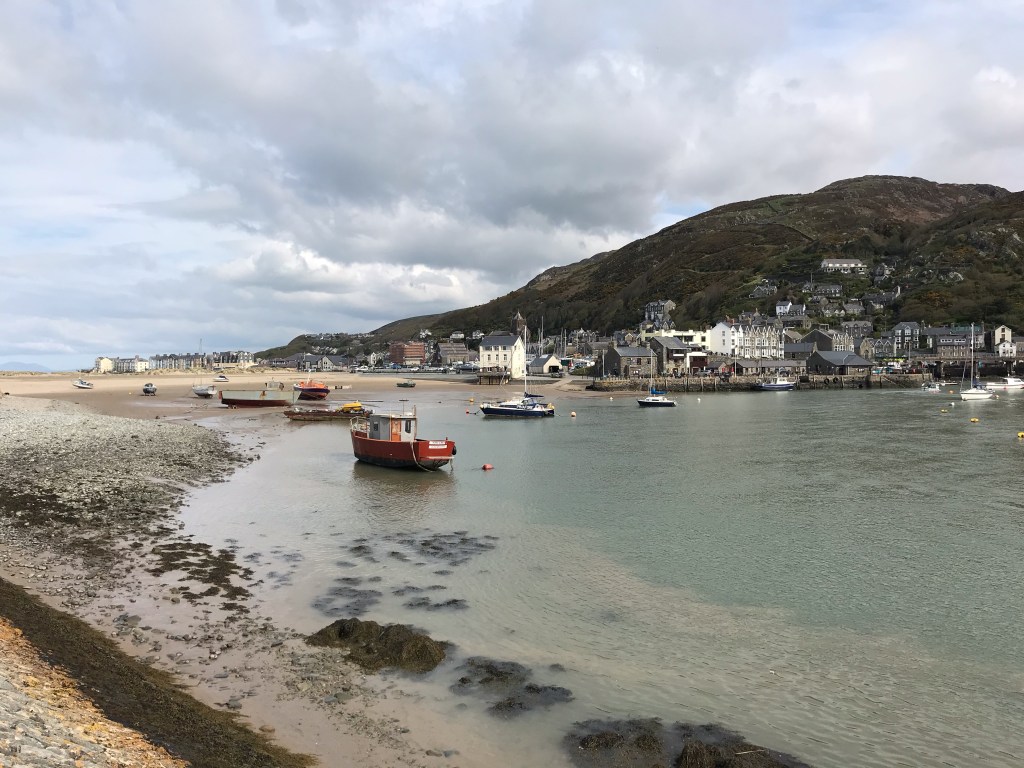
Depending on where in the world you live, or how far you are willing to travel, you will have different options available. Using my own circumstances as an example, where Northern England is the place that’s most easily accessible, there are some interesting options and picturesque locations open to me.
The Northumberland coast, for instance, offers stunning beaches and diverse fishing opportunities. Locations such as Bamburgh and Druridge Bay are renowned for their beauty and are excellent spots for both beginners and experienced anglers. The beaches of the Yorkshire coast, including Scarborough and Filey, are also popular fishing destinations offering the opportunity to catch species like cod, bass, and mackerel.
The Northwest coast of England offers further locations of interest. The three piers at Blackpool, nearby Fleetwood, and Saint Annes, offer a range of locations. Because there are nearby tourist attractions, these places can be busy; particularly in the summer months. So, if you prefer a place with less traffic, picturesque seaside villages like Silverdale and Arnside might be better if you’re looking for solitude and open spaces.
Beach fishing is not just about catching fish; it is an experience that fosters a connection with the natural world and offers the chance to meet fellow anglers. As a beginner, you will find that the fishing community is welcoming and eager to share tips and advice with newcomers to fishing.
Beach fishing is a wonderfully enriching hobby that can provide you with relaxation, physical activity, and a sense of community. The beautiful coastal spots available in northern England, could lead to countless enjoyable fishing trips and treasured memories.
If you live elsewhere in the UK, or you are happy to travel longer distances, there is no shortage of diverse locations. Because the UK is made up of islands, you are rarely very far from the coast. Ireland; the Scottish mainland, and its many surrounding islands; Cornwall; the South coast; Thames estuary; and East coast, are all full of interesting places along the border between land and sea.
If you’re absolute beginner, you would most likely benefit from some information about the equipment, or “tackle”, you will need to get you started. Below, I have provided a basic list of the essential equipment, along with options to suit different budgets. I have also included some links to a few of the places you can source the recommended tackle. So, let’s begin with the most obvious equipment.
SAFETY FIRST
Without exception, a clear safety strategy is number one in priorities. Take a look at the Royal National Lifeboat Institute (RNLI) website, and explore their advice and information on safety when fishing along the coast and more. Following their advice could be the difference between life and death so don’t underestimate it’s importance.
The Essentials
Some of the items may be new to you but don’t worry, we’ll provide more details as we go along.
1. Rod and Reel: a beachcaster rod (12-15ft) with a fixed spool or multiplier reel, depending on your preference.
2. Fishing Line:15-20lb monofilament or braid, plus a shock leader (60lb) if casting long distances.
3. Hooks: various sizes (1/0 to 4/0) for different bait and fish species.
4. Weights (sinkers): different sizes (2-6oz) depending on tide and conditions.
5. Rigs: pre-tied rigs, like pulley rigs, flapper rigs (1-or 2-hook), or simple paternoster rigs.
6. Bait: fresh or frozen (lugworm, ragworm, squid, mackerel, sand eel, etc.), plus a good size cool box to keep it fresh. This can also be used to chill any refreshments you take along.
7. Baiting Needle & Scissors: for handling soft bait and cutting lines.
Useful Accessories
8. Rod Rest (Tripod): keeps your rod stable when fishing from the beach or sea wall.
9. Tackle Box: to store hooks, weights, and other small items.
10. Headlamp or Torch: essential for night fishing.
11. Disgorger or Pliers: for safely removing hooks from fish.
12. Landing Net or Gaff: helps land larger fish.
13. Bucket or Bag: for carrying fish or soaking bait.
14. Gloves: protect hands from fish spines and cold weather.
15. Knife: for bait preparation and general use. Before heading out armed with a knife, follow the link to British Sea Fishing, and consult the information and guidance on fishermen carrying knives.
16. Clothing: waterproofs, warm layers, and non-slip boots.
17. Towel or Rag: handy for cleaning hands after baiting up.
If you’ve never fished before, you probably want something reliable but not too pricey while you’re starting out. That way, if the shore fishing experience does not meet your expectations, you won’t have spent a fortune on tackle. Also, if the gear is of good quality, you should be able to sell it and recoup some of your outlay (maybe to buy equipment suited to river or lake fishing instead).
Here are some solid rod and reel options that offer good performance without breaking the bank.
Rod Recommendations for Beach & Sea Wall Fishing.
You’ll need a beachcaster rod, typically 12-15ft long, to handle casting heavier weights and dealing with waves.
[A beachcaster rod is an impressive, long, and robust fishing rod, typically 12-15ft, created to cast substantial weights and withstand the relentless waves, making it perfect for thrilling beach or sea wall fishing adventures.]
1. Shakespeare Agility 2 Surf (12ft or 13ft, 4-8oz) – Around £60-£80.
• Good balance of quality and affordability.
• Decent casting power and sensitivity.
2. Penn Tidal Beachcaster (12ft, 4-7oz) – Around £70-£90.
• Durable and well-built.
• Suitable for most UK beach conditions.
3. DAM Salt-X Surf Rod (13ft, 4-8oz) – Around £60-£80.
• Lightweight with good casting range.
• Great for beginners.
Reel Recommendations (Fixed Spool – ideal for Beginners).
[Fixed spool reels are ideal for beach or sea wall fishing due to their ease of use and ability to cast long distances. Unlike multiplier reels, fixed spool reels minimize the risk of line tangling and are more beginner-friendly, making them perfect for handling the challenges of casting in coastal conditions.]
1. Penn Battle III 6000 – Around £80-£100.
• Strong, smooth, and saltwater-resistant.
• Can handle decent-sized fish.
2. Shimano Aerlex 10000 XTB – Around £85-£110.
• Good casting distance.
• Strong drag system.
3. Daiwa Shorecast 6000 – Around £50-£70.
• Budget-friendly but reliable.
• Decent line capacity and smooth operation.
Combo Options (Rod & Reel Together).
If you want a simpler setup, some manufacturers offer rod and reel combos:
1. Shakespeare Salt XT Beachcaster Combo – Around £80-£100.
• Good for beginners.
• Comes with a 12ft rod and a decent reel.
2. Penn Surfblaster Combo – Around £100-£120.
• Slightly better quality than entry-level combos.
• Suitable for long casting.
If you are struggling to make your mind up about what type of reel to buy, have a read through the positives and negatives linked to buying both types below. And, if this doesn’t help, you could always find a fishing tackle shop and speak to the staff. They will be more than happy to show you the different products and let you handle them to see which one feels best suited.
Buying a Rod and Reel Separately
✅ Better quality – You can choose a rod and reel that suits your fishing style and the conditions.
✅ More flexibility – If you decide you prefer a different reel later, you can swap it without replacing everything.
✅ Potential for future upgrades – If you stick with fishing, you can upgrade one part at a time rather than replacing the whole setup.
❌ Requires a bit more research – You need to make sure the rod and reel are compatible in terms of weight, casting, and line capacity.
❌ Might be slightly more expensive – But you’re more likely to get a better long-term setup.
Buying a Combo (Rod & Reel Together)
✅ Easier for beginners – The rod and reel are already matched, so you don’t have to worry about compatibility.
✅ Usually more affordable – Combos are often cheaper than buying separately.
✅ Good for testing the waters – If you’re unsure whether you’ll stick with fishing, a combo gives you a low-commitment way to start.
❌ Quality can be lower – Some combos include reels that aren’t as durable as standalone options.
❌ Limited choice – You can’t mix and match the best rod and reel for your needs.
For beginners, a combo might be the easiest way to get started but, if you’re happy to spend a little more and want something that will last longer, getting a separate rod and reel is the better choice.
If you would rather you were nudged in the right direction because you can’t be bothered with weighing up all the information or travelling around to angling outlets to explore your options in depth; then I’ve provided some recommendations below. They may not be the ideal fit for you, but they should not be terrible either.
Rod: Shakespeare Agility 2 Surf (12ft or 13ft, 4-8oz) – Around £60-£80.
• A great entry-level beachcaster rod.
• Lightweight but strong, making it easier to handle.
• Can cast a good distance with the right weight.
Alternative:
Penn Tidal Beach caster (12ft, 4-7oz) – Around £70-£90.
• A step up in durability and performance.
Reel: Penn Battle III 6000 – Around £80-£100.
• Smooth and reliable, with a strong drag system.
• Corrosion-resistant, great for saltwater fishing.
• Big enough to handle beach fishing conditions.
Alternative:
Shimano Aerlex 10000 XTB – Around £85-£110.
• Good for long casting, strong and durable.
Fishing Line:
• Mainline: 15-20lb monofilament or braid.
• Shock leader: 60lb monofilament (essential for beach casting), more info to follow…
This setup gives you a good balance of performance and durability without being too advanced or expensive.
Why You Need a Strong Main Line
• Fighting Fish – A stronger line (15-20lb for mono, or braid of equivalent strength) helps handle larger fish that put up a fight.
• Abrasion Resistance – Fishing from a beach or sea wall means your line might rub against rocks, sand, or debris in the water. A strong line helps prevent breakages.
• Casting Distance – If using braid, a thinner but strong line lets you cast further with less resistance.
Why You Need a Shock Leader (60lb Mono)
A shock leader is a thicker, stronger length of monofilament (usually around 60lb) tied to the end of your main line, typically about twice the length of your rod. It’s needed because:
• Prevents Snap-Offs – When casting heavy weights (4-6oz), the force generated is huge. Using just a main line (15–20lb) would lead to a snap under the pressure.
• Absorbs Shock – Mono stretches slightly, which helps absorb sudden shocks when casting or when a fish suddenly pulls.
• Protects Against Wear – The leader is thicker, so it’s more resistant to abrasion from sand, rocks, or fish teeth.
General Rule for Shock Leaders: For every 1oz of weight you’re casting, you need 10lb of leader strength (Example: If casting 5oz weights, you need a 50lb-60lb shock leader).
Recommendations on how to tie the shock leader to the main line.
The best knot for tying your shock leader to your main line depends on whether you’re using monofilament or braid as your main line.
For Monofilament to Shock Leader, the Albright Knot is a simple and strong choice.
How to Tie the Albright Knot:
1. Make a loop in the end of your shock leader (the thicker mono).
2. Insert about 10 inches of your main line (thinner mono) through the loop.
3. Wrap the main line around itself and the loop 10-12 times.
4. Pass the tag end of the main line back through the original loop.
5. Wet the knot and pull tight, ensuring the wraps are neatly stacked.
6. Trim excess line.
This knot is strong, compact, and passes through rod guides smoothly.
For Braid to Mono Shock Leader, the FG Knot is the best choice because it’s very slim and strong.
How to Tie the FG Knot:
1. Hold the mono leader tight and lay the braid across it.
2. Wrap the braid around the mono alternating over and under about 20 times.
3. Pull the tag ends tight so the braid grips the mono securely.
4. Finish with a few half-hitch knots around both lines to secure it.
5. Trim excess leader and braid.
This knot takes practice but is very strong and goes through rod guides smoothly.
If you want something easier for braid, the Double Uni Knot is a decent alternative.
Hooks & Rigs
The type of hook you need to use depends on three things: the fish species you’re targeting, the bait you’re using, and the fishing conditions.
Here’s a breakdown of the main hook types and when to use them for beach or sea wall fishing.
1. Aberdeen Hooks (Best for Worm Baits)
✅ Long, thin shank – Easy to remove from fish.
✅ Best for baiting with worms (lugworm, ragworm, squid strips).
✅ Good for smaller species like whiting, flounder, dabs, and school bass.
🔹 Sizes: 2 – 2/0 (larger sizes for bigger fish).
🔹 Best for: General beach fishing where you expect small to medium-sized fish.
2. Circle Hooks (Best for Catch and Release)
✅ Curved point – Hooks fish in the corner of the mouth.
✅ Reduces deep hooking – Ideal if you want to release fish safely.
✅ Good for bass, rays, and other larger species.
🔹 Sizes: 1/0 – 4/0 for bass, 3/0 – 6/0 for bigger species like smoothhound.
🔹 Best for: Fishing from the beach or sea wall where bigger fish are possible.
3. J Hooks (Standard Shape) (Best for Large Baits)
✅ Versatile – Can be used with most baits.
✅ Hooks well into larger fish; like cod, bass, or rays.
✅ Needs a proper strike (unlike circle hooks, which hook themselves).
🔹 Sizes: 2/0 – 6/0 for medium to large fish.
🔹 Best for: Baiting with mackerel chunks, squid, or sandeel.
4. Baitholder Hooks (For Holding Soft Bait in Place)
✅ Small barbs on the shank – Helps hold soft baits like ragworm or peeler crab.
✅ Good all-rounder – Works well for both small and medium fish.
🔹 Sizes: 4 – 2/0 (small sizes for flatfish, larger for bass and cod).
🔹 Best for: Fishing from piers or sea walls with softer baits.
5. Pennel Rig Hooks (Double Hook Setup for Large Bait)
✅ Uses two hooks – A larger bottom hook and a smaller top hook.
✅ Great for bigger fish like cod, rays, and smoothhound.
✅ Holds big baits like whole squid or mackerel fillets securely.
🔹 Sizes: 4/0 – 6/0 (for bigger fish).
🔹 Best for: Casting large bait from the beach or sea wall.
Choosing the Right Hook for Where You Fish
• For general beach fishing – Aberdeen hooks (size 2 to 2/0) for worms and small fish.
• For rough ground or big fish – Circle hooks or J hooks (2/0 to 6/0) for bass, cod, and rays.
• For sea wall fishing – Baitholder or Aberdeen hooks (size 4 to 2/0) for mixed species.
• For targeting big fish – Pennel rigs (4/0 to 6/0) with large bait.
Here are some simple but effective rigs that match the hooks above, and are perfect for beach and sea wall fishing.
1. 1-Hook Flapper Rig (General Purpose Rig)
✅ Best for: Catching a variety of species like whiting, flatfish, bass, and small cod.
✅ Good for clean beaches and sea walls.
✅ Works with most baits (worm, squid, fish strips).
🔹 Setup:
• Hook: Aberdeen size 2 to 2/0.
• Weight: 3-5oz lead (depends on conditions).
• Line: 30-50lb rig body, 15-20lb hook snood.
• Best bait: Lugworm, ragworm, squid strips.
🔹 Why use it?
• Simple to tie and doesn’t tangle easily.
• Can be cast far or dropped off a sea wall.
2. 2-Hook Flapper Rig (For Catching More Fish)
✅ Best for: Increasing your chances by fishing at two depths.
✅ Works well for whiting, dabs, plaice, and school bass.
✅ Good from beaches and sea walls.
🔹 Setup:
• Hooks: Aberdeen size 4 to 1/0.
• Weight: 3-5oz lead.
• Line: 40-50lb rig body, 15-20lb snoods.
• Best bait: Worms, fish strips, peeler crab.
🔹 Why use it?
• Can catch two fish at once.
• Great for fishing different depths near the seabed.
3. Pulley Rig (For Big Fish like Bass, Cod, and Rays)
✅ Best for: Large fish that take bigger baits.
✅ Designed to reduce snags on rough ground.
✅ Ideal for beaches with rocks or mixed ground.
Differences Between Clean, Mixed, and Rough Ground When Beach Fishing
When beach fishing, understanding the differences between clean, mixed, and rough ground is crucial for selecting the appropriate gear and techniques to maximize your catch.
Clean Ground:
Clean ground refers to sandy or muddy beaches with minimal obstructions. This type of terrain is relatively smooth and even, making it easier to cast and retrieve your line without encountering many snags. Clean ground is ideal for beginners due to its forgiving nature and is often home to species such as flatfish, whiting, and bass. Anglers fishing on clean ground typically use lighter rigs and weights, such as the flapper rig, which allows for optimal bait presentation and minimal resistance in the water.
Mixed Ground:
Mixed ground features a combination of sand, shingle, rocks, and sometimes patches of weed. This varied terrain provides habitats for a wider range of fish species, including cod, rays, and smoothhounds. Fishing on mixed ground requires more versatile and robust gear to cope with the changing bottom conditions. Rigs such as the two-hook flapper or pulley rig are preferable, as they can handle the occasional snag and still present bait effectively at different depths. Anglers should be prepared to adjust their tackle and strategies based on the specific composition of the mixed ground they are fishing on.
Rough Ground:
Rough ground consists of rocky, uneven, and often kelp-covered areas that pose significant challenges due to the likelihood of snags and line breakages. This terrain is favoured by larger, predatory fish like bass, cod, and conger eels that seek shelter and ambush prey among the rocks and seaweed. Fishing on rough ground demands heavy-duty rigs and strong lines, such as the pulley rig or pennel rig, designed to withstand the harsh conditions and reduce the risk of losing tackle. Anglers need to use heavier weights and robust hooks to ensure their bait stays in place and can attract the larger fish that inhabit these rugged environments.
Understanding these differences allows you to tailor your approach, ensuring use of the most suitable equipment and techniques for the specific type of ground, thereby increasing the chances of a successful fishing trip.
🔹 Setup:
• Hook: Circle or J hook, size 3/0 to 6/0 (or Pennel rig with two hooks).
• Weight: 4-6oz lead.
• Line: 60lb shock leader, 40-50lb rig body, 25lb hook snood.
• Best bait: Whole squid, mackerel fillet, sandeel.
🔹 Why use it?
• Lifts the weight when reeling in, reducing snagging.
• Strong enough for bigger fish.
4. Pennel Rig (For Big Baits and Big Fish)
✅ Best for: Targeting large fish: cod, bass, rays, and smoothhound.
✅ Uses two hooks to hold a large bait in place.
🔹 Setup:
• Hooks: Two J or circle hooks, size 4/0 to 6/0.
• Weight: 4-6oz lead.
• Line: 60lb shock leader, 50lb rig body, 25lb hook snood.
• Best bait: Whole squid, mackerel head, peeler crab.
🔹 Why use it?
• Helps hook fish more securely.
• Keeps large bait presented neatly.
Which Rig Should You Start With?
• For general fishing: 1- or 2-hook flapper rig (sizes 2 to 1/0).
• For bigger fish: Pulley rig (size 3/0 to 6/0).
• For rough ground or big baits: Pennel rig (size 4/0 to 6/0).
The flapper rig is one of the best all-round rigs for beach and sea wall fishing. It’s simple to tie, doesn’t tangle easily, and lets you fish with one or two hooks at different depths.
Here’s how to tie a 1-hook flapper rig:
What You’ll Need:
✔ Rig body: 40-50lb monofilament or fluorocarbon
✔ Hook snood: 15-20lb monofilament (thinner line for flexibility)
✔ Hook: Aberdeen size 2 to 2/0 (adjust for target fish)
✔ Swivel: Size 6 or 8
✔ Beads: Small plastic beads (optional, for attraction)
✔ Crimps: To hold components in place (optional)
✔ Clip/swivel link: To attach your weight
✔ Weight: 3-5oz lead, depending on conditions
Step-by-Step Instructions:
Cut the Rig Body – Measure about 30-40 inches of 40-50lb line. This forms the backbone of your rig.
Tie the Swivel at the Top – Use a strong knot (e.g., Uni Knot) to attach a swivel at the top. This is where you connect your main line.
Create the Hook Snood Dropper
• Measure 10-15 inches of 15-20lb line for the hook snood.
• Attach one end to a small swivel or a dropper loop knot on the rig body.
• Slide a bead, crimp, and another bead above the swivel if you want to keep the snood fixed in place.
Attach the Hook
• Tie your Aberdeen hook onto the end of the snood using a Snell Knot or Improved Clinch Knot.
Attach the Weight
• At the bottom of the rig body, tie a clip swivel or a breakaway lead clip.
• This lets you swap weights easily.
Check & Adjust
• Make sure the snood isn’t too long (or it may tangle).
• If using crimps, lightly squeeze them to hold components in place.
• Your rig should now have:
• A swivel at the top
• A hook snood halfway down
• A lead clip at the bottom
Why This Rig Works Well
✔ Simple & effective – Great for most beach/sea wall fishing.
✔ Minimal tangles – Snood stays clear of the main line.
✔ Versatile – Works with worms, squid, and fish strips.
Here are the essential knots you’ll need to tie a flapper rig (and most other fishing rigs).
Uni Knot (For Tying Swivels and Hooks)
✅ Strong and reliable
✅ Easy to tie and works with most fishing lines
How to tie:
1️. Thread the line through the eye of the hook/swivel and double it back about 6 inches.
2️. Make a loop by laying the tag end over the doubled line.
3️. Wrap the tag end around both lines 5-7 times.
4️. Moisten the knot, then pull the tag end to tighten the wraps.
5️. Slide the knot down to the hook/swivel and pull tight.
Dropper Loop (For Attaching the Hook Snood to the Rig Body)
✅ Creates a strong loop for the hook snood
✅ Useful when making multi-hook rigs
How to tie:
1️. Take a section of the rig body and form a loop where you want the hook snood.
2️. Twist the loop 6-8 times.
3️. Pass the loop back through the middle of the twists.
4️. Pull both ends of the line to tighten the loop.
Blood Knot (For Joining Two Lines, Like Shock Leader to Main Line)
✅ Good for mono-to-mono connections
✅ Strong and slim, so it passes through rod guides smoothly
How to tie:
1️. Overlap the ends of both lines by 6 inches.
2️. Wrap one line around the other 5-7 times, then pass the tag end through the gap.
3️. Repeat with the other line, wrapping in the opposite direction.
4️. Moisten the knot and pull both main lines to tighten.
Improved Clinch Knot (For Tying Hooks to Snoods)
✅ Easy to tie and holds well
✅ Best for mono lines
How to tie:
1️. Thread the line through the eye of the hook and make 5-7 wraps around itself.
2️. Pass the tag end through the small loop near the hook eye.
3️. Moisten and pull tight.
Grinner Knot (For Tying Line to a Swivel or Clip)
✅ Stronger alternative to the Uni Knot
✅ Great for heavier lines (like shock leaders)
How to tie:
1️. Pass the line through the swivel or clip twice to form a loop.
2️. Wrap the tag end around the main line and through the loop 4-6 times.
3️. Moisten and pull tight.
To start, you’ll want to target species that are easier to catch and land, such as whiting, flatfish (flounder, dab, plaice), school bass, and small codling. These fish are common around UK beaches and sea walls, and they don’t require heavy gear or advanced techniques.
Beginner-Friendly Fishing Setup
1. Rod & Reel
✔ Rod: 12ft beachcaster (Shakespeare Agility 2 Surf, Penn Tidal)
✔ Reel: Fixed spool reel (Penn Battle III 6000 or Daiwa Shorecast 6000)
✔ Line: 15-20lb monofilament main line with a 60lb shock leader
2. Rig: 2-Hook Flapper Rig (Best for Mixed Species & Frequent Bites)
✅ Why? This rig lets you present two different baits at once, increasing your chances of a bite.
✅ Hook size: Aberdeen hooks, size 2 to 1/0 (small enough for whiting, but strong enough for small bass or codling).
✅ Weight: 3-5oz lead (adjust for tide strength).
🔹 How to fish it:
• Cast close to medium range (20-50 yards), as many beginner-friendly fish stay near the shore.
• Keep the bait on or just above the seabed, as flatfish and whiting hunt there.
3. Bait: Easy & Effective Options
✅ Lugworm/Ragworm – Best all-round bait for whiting, flatfish, and school bass.
✅ Squid strips – Great for whiting and small codling.
✅ Mackerel strips – Good for whiting and bass.
✅ Peeler crab – Excellent for flounder and small cod.
🔹 Best beginner bait: Lugworm (easy to use and very effective).
Why This Setup Works for Beginners
✔ Catches smaller, more manageable fish – No need to wrestle with big rays or strong smoothhounds.
✔ Frequent bites – Keeps things exciting while you’re learning.
✔ Simple baiting and fishing technique – Just cast, let it settle, and wait for a bite.
Reading the beach is an important skill that will help you find the best fishing spots and increase your chances of catching fish. Here’s what to look for:
1. Identifying Features on the Beach
✅ Gullies & Channels (Best for Flatfish, Whiting, and Bass)
• These are deeper trenches where fish patrol looking for food.
• Look for areas where water runs back into the sea more strongly after a wave.
✅ Sandbanks & Troughs (Good for Various Species)
• Fish often sit in the deeper troughs between sandbanks.
• Best fishing is on the seaward side of a sandbank where the drop-off begins.
✅ Rocky Patches & Weed Beds (Ideal for Bass & Cod)
• These areas hold crabs, shrimp, and small fish, attracting predators.
• Great for bass, codling, and flounder, but can be snaggy.
✅ Where Waves Break (Turbulent Water = Food & Fish)
• If waves are breaking far out, there may be a sandbank.
• If waves suddenly flatten, it indicates a deeper channel where fish are likely to be.
✅ Rip Currents (Dark, Calm Sections in the Surf)
• These pull food out to sea and create feeding zones.
• Often appear as darker, smoother areas in between breaking waves.
2. Best Places to Cast Your Line
🔹 Short Range (10-30 yards): Best for flatfish and school bass, especially in shallow troughs.
🔹 Medium Range (30-60 yards): Good for whiting and codling in deeper gullies.
🔹 Long Range (60+ yards): Needed if fish are further offshore, but not always required.
3. Fishing the Tide: When to Fish?
• Incoming Tide (Flood Tide) – Best time to fish, as fish move closer to shore.
• High Tide (1 Hour Before & After) – Great for whiting and bass.
• Outgoing Tide (Ebb Tide) – Can still be productive in deeper channels.
4. Observing the Beach at Low Tide
• Visit at low tide to spot gullies, sandbanks, and rough ground.
• Take photos or mental notes so you know where to cast when the tide comes in.
Handling fish properly helps protect both the fish and yourself. Here’s how to safely unhook a fish while causing minimal harm.
Always check local laws on handling and dispatching fish as these may vary between species and locations. Follow the link to British Sea Fishing for information.
1. Use the Right Hook Type
✅ Circle Hooks – These hook fish in the corner of the mouth, making removal easier.
✅ Barbless Hooks – Easier to remove and reduce injury.
✅ Aberdeen Hooks – Thin wire and long shank make them easy to grip and remove.
If you’re using barbed hooks, you can flatten the barb slightly with pliers to make unhooking easier.
2. Essential Tools for Hook Removal
✔ Long-Nose Pliers or Forceps – Helps grip and remove deep-set hooks.
✔ Disgorger (T-Bar Tool) – Best for small fish like whiting or flatfish.
✔ Wire Cutters – Useful if a hook is too deeply embedded and needs to be cut.
3. How to Remove the Hook Safely
A. If the Hook is in the Fish’s Mouth (Best-Case Scenario)
1️. Hold the fish gently – Avoid squeezing too hard, as this can damage internal organs.
2️. Use pliers or a disgorger – Grip the hook firmly.
3️. Twist and push back in the same direction the hook went in.
4️. If needed, rotate the hook slightly to free it.
🔹 Tip: If the fish is wriggling too much, try holding it belly-up for a moment—it often calms them down.
B. If the Hook is Deep (Down the Throat)
1️. Use a disgorger or long pliers – Reach in and gently turn the hook.
2️. Try not to pull hard – This can cause more damage.
3️. If the hook won’t come out, cut the line as close to the hook as possible and release the fish.
🔹 Many fish can expel a deep-set hook over time, especially if it’s a fine-wire Aberdeen.
C. If You’re Keeping the Fish (For Eating)
• If the fish is legal size and you plan to keep it, a quicker removal method is fine.
• Dispatch it humanely before removing the hook (a quick knock to the head with a blunt object or using a spike for instant dispatch).
4. Handling & Releasing Fish Safely
✅ Support the fish properly – Hold it under the belly, not by the gills.
✅ Minimize time out of water – If possible, unhook the fish while still in the water.
✅ Revive tired fish – If a fish seems sluggish after release, hold it gently in the water until it swims away on its own.
Humane handling and dispatching of fish is crucial to ethical angling. Follow the link to gov.uk to learn more about UK laws on fishing.
1. How to Humanely Dispatch a Fish
If you plan to keep a fish for eating, it’s important to kill it quickly and as humanely as possible to avoid unnecessary suffering. There are two main methods:
A. Percussive Stunning (Best for Most Fish)
✅ Quick and effective for fish like bass, cod, whiting, and flatfish.
🔹 How to do it:
1️. Place the fish on a firm surface.
2️. Use a priest (a small, weighted club) or a solid object like a rock.
3️. Strike firmly on the head, just above the eyes.
4️. The fish should be instantly unconscious, and a second strike ensures it’s dispatched.
🔹 Signs of effective stunning:
• No movement or twitching after a few seconds.
• Eyes become glassy.
B. Ike Jime (Best for Preserving Fish Quality)
✅ Used by commercial and sport anglers to improve the taste of fish.
🔹 How to do it:
1️. Stun the fish (as above) to prevent suffering.
2️. Use a sharp spike (like a screwdriver or Ike Jime tool) to pierce the brain (just above and slightly behind the eyes).
3️. The fish will go limp immediately.
4️. Cut the gills and bleed the fish for better meat quality.
🔹 Why do this?
• Stops stress chemicals from affecting the meat.
• Great for fish like bass and cod that you plan to eat fresh.
How to Tell If a Fish is Legal to Keep
Fishing laws vary by species and location, but in general:
✅ Check local size limits – Many species have minimum size limits to protect younger fish.
✅ Use a measuring tape or fish measure – Measure from the tip of the snout to the tail fork.
✅ If undersized, release immediately – Even if the fish is deeply hooked, do your best to let it go safely.
🔹 Common UK Minimum Sizes (Varies by Area). Always Check Local governing bodies for up to date information.
• Bass – 42cm (catch-and-release only for part of the year)
• Cod – 35cm
• Whiting – 27cm
• Flounder – No legal limit, but 25cm+ is a good rule
• Plaice – 27cm
In North West England, recreational sea anglers should adhere to the Minimum Conservation Reference Sizes (MCRS) to promote sustainable fishing practices: Check the official guide, but the rough guide below will give you some idea.
• Bass: 42 cm
• Cod: 35 cm
• Haddock: 30 cm
• Herring: 20 cm
• Horse Mackerel: 15 cm
• Mackerel (North Sea): 30 cm
• Mackerel (Other Areas): 20 cm
• Sole: 24 cm
• Plaice: 27 cm
• Whiting: 27 cm
• Hake: 27 cm
• Ling: 63 cm
For European Sea Bass, specific regulations apply: Check official guides. Rough guide provided below.
• January 1st to January 31st: Up to two bass (minimum size 42 cm) per angler per day.
• February 1st to March 31st: Catch and release only.
• April 1st to December 31st: Up to two bass (minimum size 42 cm) per angler per day.
These rules apply whether fishing from a boat or the shore.
Please note that regulations can change, and it’s essential to consult the latest guidelines from local authorities or bodies such as the North Western IFCA before fishing. Always measure your catch accurately and release any undersized fish promptly to support conservation efforts.
Some Tips on How to Measure Your Catch Accurately.
To help ensure your fish meets the minimum legal size, follow these steps:
✅ Use a Proper Measuring Tool – A fish measure board, ruler, or tape measure with clear markings in cm.
✅ Measure from Snout to Tail Fork – Lay the fish flat and measure from the tip of the snout to the fork of the tail (not the very end of the tail fins).
✅ Keep the Fish Straight – Don’t stretch the fish unnaturally, but make sure it’s fully extended.
✅ Check Twice Before Keeping – If a fish is just on the limit, it’s best to release it rather than risk breaking regulations.
🔹 Example: If the minimum size for bass is 42 cm, measure from the tip of the mouth (closed) to the middle fork in the tail. If it’s under 42 cm, it must be released.
Local Fishing Regulations (North West England), a rough guide.
🔹 Bag Limits: Some species (like bass) have restrictions on how many you can keep per day.
🔹 Closed Seasons: Certain fish (like bass from February to March) are catch-and-release only for part of the year.
🔹 Protected Species: Some fish (like tope sharks) are illegal to keep and must be released.
The best way to stay updated in North West England, is to check the North Western IFCA website: www.nw-ifca.gov.uk
Safe Fish Handling Techniques
Proper handling ensures the fish stays healthy if released and in good condition if kept for eating.
A. Handling a Fish for Release
✅ Wet Your Hands First – Dry hands remove the fish’s protective slime, making them vulnerable to infection.
✅ Hold Gently – Support under the belly and avoid squeezing, which can damage internal organs.
✅ Keep It Low – If taking a photo, keep the fish low over water or a soft surface to prevent injury if dropped.
✅ Unhook Quickly – The longer a fish is out of water, the more stress it experiences.
✅ Revive If Needed – If the fish seems sluggish, hold it upright in shallow water and gently move it forward to help oxygen flow over its gills.
🔹 Special Tips for Specific Fish:
• Flatfish (Plaice, Flounder, Dab): Handle gently as their skin is delicate.
• Bass: Hold under the belly and avoid the spiky dorsal fin.
• Cod/Whiting: Handle carefully as they have sharp gill plates.
B. Handling a Fish You Plan to Keep
✅ Dispatch Humanely – Use a priest (small club) for a quick, clean stun or the Ike Jime method (brain spike) for better meat quality.
✅ Bleed the Fish (Optional) – Cutting the gills helps improve taste and shelf life.
✅ Keep Cool – Store in a cool bag or on ice to preserve freshness.
2. Recommended Fish Measuring Tools
✔ Basic Measuring Tape – Cheap and easy, but can be tricky with wriggly fish.
✔ Plastic Fish Measure Board – Has a raised end for accurate snout-to-tail measurement.
✔ Decathlon Telescopic Fish Measure – Foldable, and ideal for shore anglers.
✔ Sea Angler Pro Measure Mat – Waterproof and rolls up for easy storage.
🔹 Best Choice for Beginners: A rigid measuring board or a marked fish ruler on a bait bucket lid—both are easy to use when fishing alone.
Fish Storage Methods
The right storage method keeps your catch fresh if you plan to eat it. Here are some options:
A. Keeping Fish Fresh While Fishing
✅ Cool Bag with Ice Packs – A soft insulated bag with reusable ice packs works well for short trips.
✅ Chiller Box (Cool Box) – A hard-sided cooler with ice or frozen bottles keeps fish fresher for longer.
✅ Wet Towel Method – If you don’t have ice, wrapping the fish in a damp towel and keeping it shaded helps.
✅ Fish Stringer (For Live Storage) – If fishing from a pier or sea wall, a stringer lets fish stay in the water until you’re ready to take them home.
🔹 Best Option: A cool bag with ice packs is simple, lightweight, and keeps fish in good condition for a few hours.
B. Storing Fish at Home
✅ Fridge (Short-Term) – Store gutted fish on ice or in a sealed container and eat within 24-48 hours.
✅ Freezer (Long-Term) – Wrap fish tightly in cling film or vacuum-seal bags to prevent freezer burn.
🔹 Tip: If freezing, remove as much air as possible from the packaging to preserve freshness.
2. Setting Up a Good Tackle Box
A well-organized tackle box makes fishing easier and more enjoyable. Here’s some suggestions on what to include:
A. Essentials for Your Tackle Box
✔ Hooks – A range of Aberdeen (size 2-2/0), circle hooks (1/0-4/0), and J-hooks for different fish.
✔ Weights – A mix of grip leads (3-5oz for beaches) and plain leads for calmer waters.
✔ Rigs – Pre-tied flapper, pulley, and Pennel rigs stored in resealable bags.
✔ Scissors & Line Cutters – For cutting line and bait.
✔ Pliers or Forceps – For unhooking fish safely.
✔ Disgorger – Essential for removing hooks from smaller fish like whiting.
✔ Baiting Needle – Helps with soft baits like worm or squid.
✔ Elastic Bait Thread – Keeps bait secure on the hook.
✔ Spare Line & Shock Leaders – In case of snags or line breaks.
✔ Headlamp (For Night Fishing) – Hands-free lighting for unhooking fish.
✔ Small First Aid Kit – Plasters, antiseptic wipes (for handling hooks and fish spines).
B. Storing Your Gear Efficiently
✔ Use a Multi-Compartment Box – Keeps hooks, weights, and accessories separate.
✔ Label Small Boxes – “Hooks,” “Weights,” “Rigs” to make finding things quicker.
✔ Keep Pre-Tied Rigs in Bags – Stops them from tangling.
✔ Store Scissors & Pliers in an Easy-Access Pocket – You’ll use them often!
🔹 Best Beginner Tackle Box Option: A medium-sized, waterproof tackle box with compartments, or a shoulder bag with rig wallets for easy access.
Bait Storage: Keeping Bait Fresh & Ready to Use
The right storage method depends on the type of bait you’re using. Here’s how to store different baits effectively for short-term (while fishing) and long-term (at home) use.
1. Worm Baits (Lugworm & Ragworm)
A. Storing Worms While Fishing
✅ Best Option: A cool, ventilated bait box with damp seaweed or newspaper.
• Do NOT store in water—they will suffocate.
• Keep in the shade or a cool bag to prevent overheating.
B. Storing Worms at Home
• Fridge Storage: Keep them in a shallow tray with damp newspaper & seaweed at 5-7°C.
• Lifespan: Lugworm = 2-3 days, Ragworm = 4-7 days.
• Check daily—remove any dead worms to prevent them spoiling the rest.
🔹 Freezing Worms? Blow Lugworm (yellow inside) freezes well, but standard lug and ragworm turn mushy when thawed.
2. Squid & Fish Baits (Mackerel, Herring, Sandeel)
A. Storing While Fishing
✅ Best Option: Keep in a sealed tub or vacuum bag inside a cool box with ice packs.
• Squid and fish baits go soft quickly in warm weather, so keep them cold for best results.
B. Storing at Home
• Fridge: Wrap in cling film and store for 1-2 days max.
• Freezer: Wrap tightly in cling film or vacuum-seal bags to prevent freezer burn.
• Thawing: Take out only what you need—refreezing affects quality.
🔹 Tip: Pre-cut squid and mackerel into strips before freezing for easy use.
3. Peeler Crab
A. Storing While Fishing
✅ Best Option: Keep in a damp cloth or moss inside a bait box.
• Keep out of direct sunlight and away from ice packs (too cold will kill them).
B. Storing at Home
• Fridge: Store in a tray with damp newspaper or seaweed for 3-5 days.
• Freezer: Remove legs, wrap in cling film, and freeze individually to stop them sticking together.
🔹 Best Use: Frozen crab works well for cod and smoothhound, but fresh crab is always better.
4. Artificial Baits (Good Backup Option)
✅ Soft Plastics (Sandeel, Worms, Shrimps) – Store in sealed packs to stop them drying out.
✅ Frozen Ready Baits (Bluey, Mackerel, Squid) – Keep in the freezer for emergencies.
🔹 Tip: Always bring backup frozen bait in case fresh bait runs out or conditions change.
Best Storage Setup for a Beginner?
• Cool Bag with Ice Packs – For keeping bait fresh while fishing.
• Small Bait Box (With Ventilation) – For worms, crab, or sandeel.
• Plastic Tubs or Zip Bags – For squid and fish baits.
• Fridge & Freezer Storage System – Separate trays for fresh and frozen bait.
If you are anything like me, you may be able to make more sense of information when you see a video of something being done by a skilled person. I have trawled through various YouTube channels that offer guidance on many aspects of fishing and, for me, the best one I have found is TA(totally awesome) Fishing. Have a look at the video below and see if it helps you understand know tying better. I have attached some time stamps to get you quickly to anything specific you want to see.
How to Tie Fishing Knots Part 1
Time Interval: 00:00 – 26:37
Summary
• 🎣 Importance of Proper Knots – A poorly tied knot can lead to losing the fish of a lifetime. The video explains essential knots to ensure secure fishing.
• 🪢 Blood Knot – A standard fishing knot for general use. The key to success is ensuring the tag end is properly secured and lubricating the knot with spit to prevent friction damage.
• 🔒 Tucked Blood Knot – An improved version of the blood knot with an extra tuck for added security. This prevents slippage under high tension.
• 🎯 Uni Knot – A versatile and reliable knot for bait fishing and lures. It cinches down tightly and is resistant to slipping.
• 🌀 Loop Knot – Designed for live bait and lure fishing, this knot allows the hook to move freely, giving natural action to the bait.
• ⚓ Snell Knot – Used for attaching hooks without an eyelet. It provides a direct line pull for maximum strength and is commonly used in bait fishing.
• 🔗 Albright Special – A knot designed for joining lines of different diameters, perfect for adding leaders or repairing broken lines. It’s strong, streamlined, and good for fly fishing.
• 🏆 Surgeon’s Loop & Offshore Trolling Knot – The surgeon’s loop creates a double line for added strength, while the offshore trolling knot secures a swivel, essential for big game fishing.
• 🦈 Double Line Technique – Useful for fighting large fish like marlin and sharks. If one part of the line breaks, the backup section keeps the fish on.
Insights Based on Numbers
• 🔢 5 Wraps – Many knots, like the blood knot and uni knot, require 5 wraps to ensure a strong hold.
• 🎯 70-Pound Line – The video demonstrates knots using thick, 70-pound mono for visibility, but the techniques apply to all line strengths.
• ⏳ 26-Minute Tutorial – A detailed step-by-step guide to tying knots that can be used in both freshwater and saltwater fishing.
Here are 10 key timestamps from the video:
1. 🎣 Importance of Proper Knots – Why tying knots correctly is crucial in fishing.
2. 🪢 Blood Knot Tutorial – Step-by-step guide to tying a standard blood knot.
3. 🔒 Tucked Blood Knot – An improved version for better security.
4. 🎯 Uni Knot Demonstration – A versatile knot for bait fishing and lures.
5. 🌀 Loop Knot for Lure Fishing – Ideal for live bait or lures that need movement.
6. ⚓ Snell Knot for Hook Attachments – Used for securing hooks without an eyelet.
7. 🔗 Albright Special Knot – Best for joining lines of different diameters.
8. 🏆 Surgeon’s Loop for Double Line – Adds extra strength for big fish.
9. 🦈 Offshore Trolling Knot – Secures a swivel, crucial for big game fishing.
10. 🎣 Final Tips and Knot Review – Recap and advice on when to use each knot.
Discover more from MiniRag ©
Subscribe to get the latest posts sent to your email.
